
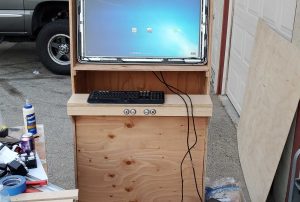
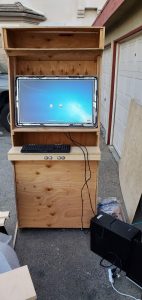
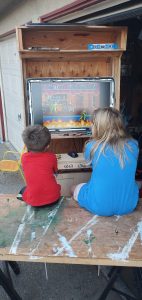
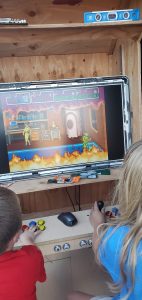
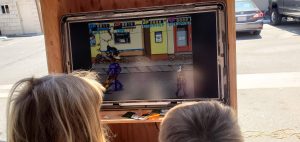
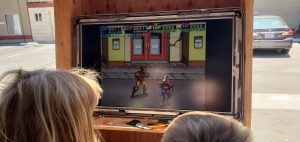
Here is a little demo of the kids testing out the basic setup.
Introduction:
Today I am writing about the Retro Arcade Project I have been working on. Most of the kids these days don’t know what we (Born before 2000) went through to get some game time in. Saving up some funds, skating or biking down to the Arcades and then playing for as long as our quarters will last. I still remember putting a quarter on the ledge by the screen suggesting I would be next in line for Teenage Mutant Ninja Turtles, Killer Instinct or Tekken.
My Favorites though was Gauntlet 1 & 2, Teenage Mutant Ninja Turtles and X MEN. I remember playing for hours on those games, while others came and gone, I would get the max out of my dollars and more importantly, quarters.
So, as I am in my 40’s and have 3 kids of my own. I wanted some of that nostalgia back but without spending a limited supply of quarters. I also wanted a project where I can invite my kids and teach them about using their minds, their early math skills and of course, what button mashing was all about outside of a keyboard and mouse. We don’t have the normal Xbox, PlayStation or Nintendo TV hogging systems. I keep it light in the house and limit it to 2/3DS’s and mobile devices.
So, lets get started.
The Start
Coming up with a design. If you search the World Wide Web you could find plans and designs for every type of game unit the world has ever made and some that isn’t so common. For me I wanted something more unique and less plywood hungry, but I also wanted something that can handle 6 Buttons per player. I also wanted the option to keep the arcade cooler as I considered using a more power hungry PC to make the arcade and possibly add more emulators. I have a future design build that will include a Racing Pod or a MechWarrior Pod.
To start, I used an old Dell ™ Vostro i5 3 series with 8 gigs of ram (way way more than any retro game will ever need) and a spare 120gig SSD, much faster than anyone’s needs but it was just laying around so why not. OS: Windows 7, I get by the time you read this that Windows 7 is no longer supported by the big Microsoft ™ but it doesn’t mean it still isn’t useful. Remember, we’re building a retro arcade, before i5’s and i7’s or even i3’s were a thing, before Windows 7 was a thing. This box shouldn’t even see the internet so security and anti-virus filters are not needed either.
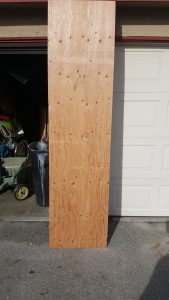
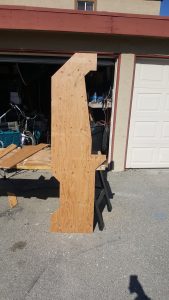
I used ¾ Plywood as I knew it was going to be touching the elements and if for some reason water hit it, I didn’t want the cabinet to fall apart. The thickness also allowed for stronger joints between one another and option to increase supports for the sides. The plan I designed only uses 2 full 4×8 sheets of Plywood and can suite monitors/tv’s/screens up to 46”.
To start, I only wanted 2 players as I had a spare EloTouch 3202L (32” Touch Screen). I wanted to also design the same cabinet to be able to handle up to 4 or even 6 players.
The next thing to do is shop online for Joysticks and buttons. This again is up to you. I used LED backlit buttons but plan buttons work just as well. I have kids so the glow stuff is in for them, plus if it sticks around long enough, I expect it to be a Dorm Room hit.
I have a list of all the materials and tools used below. I did attach some spots for Arcade Cabinet designs but if you are looking for mine; that will cost you. If you need help designing something, ask. If you are seeking one or feel you can make a cabinet, see below to get in contact with me and let’s get you gaming!
The Build
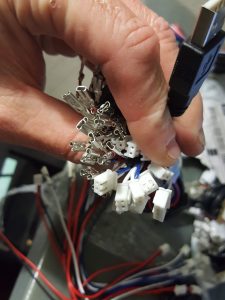
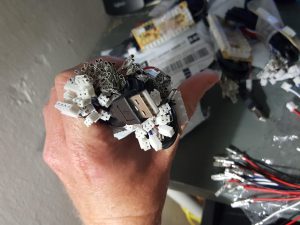
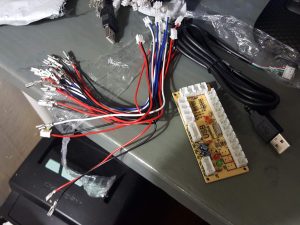
Electronics:
Here is a few shots of the Zero Delay Controller Boards I used.
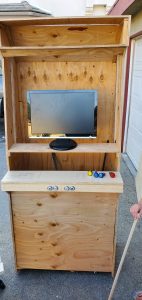
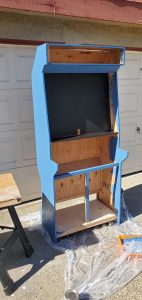
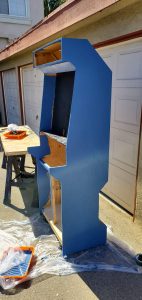
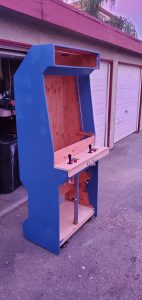
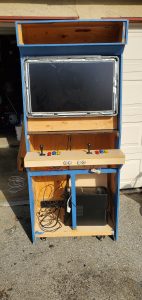
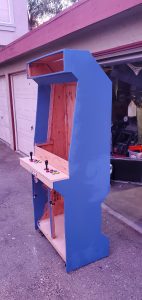
Build Process:
Here is the progress images for the Arcade Cabinet with the kids testing it out.


Like it and want one?
Designs, Materials List & Tools list:
I don’t make money off the links below, they are direct links.
Materials:
2x 8’x4’ ¾ (more commonly known as 23/32)
https://www.homedepot.com/p/Sanded-Plywood-FSC-Certified-Common-23-32-in-x-4-ft-x-8-ft-Actual-0-703-in-x-48-in-x-96-in-578994/100000837
4 Casters: I used 2″ black casters with 150lb per caster with lock on all 4 sides. I designed the bottom of the Arcade Cabinet to hide them to make it easier for moving around or transporting.
https://www.ebay.com/itm/Rubber-Base-Top-Plate-Total-Lock-Brake-Pack-of-4-Black-By-Online-Best-Service/252872924353?var=551884434532&hash=item3ae0669cc1:m:mseTHFA5p8qxDjyXDogSbPw
Tools:
Brad Nailer for the Brad Nails
1”, 1 ½” & 2” Brad Nails for the 18 Gauge Nailer (if you use the same thickness in materials)
Circular Saw and/or Table Saw:
Wood Glue: https://www.homedepot.com/p/Titebond-II-16-oz-Premium-Wood-Glue-5004/100144210
Plexiglass
Plexiglass cutter or a metal saw blade flipped backwards for the circular saw. Use bluetape over your cut line to make a perfect cut with no cracks.
Blue Tape
Monitor/TV (Your choice) (What I used: https://www.newegg.com/p/16C-0018-00004?item=9SIA2F86M95291&source=region&nm_mc=knc-googlemkp-pc&cm_mmc=knc-googlemkp-pc-_-pla-buyvpc-_-led+tv-_-9SIA2F86M95291&gclid=CjwKCAiA35rxBRAWEiwADqB377P2UvFOA_vCE00ozZYKhSOUiMD9-NRJFo9JGeOdB4ZI2JOXG521zRoCsGMQAvD_BwE&gclsrc=aw.ds )
Arcade Electronics:
Joystick, 4 Way, 8 Way, 2 Way (your choice) x 1+ : Sanwa brand is what I used. This is what real arcades use and they are built for over 40 Million cycles (10 Million per direction if divided) (each movement is a cycle)
Buttons: Your choice, Again Sanwa
Control Board: Zero Delay USB. You don’t want delay in your movement and make sure the joystick you choose will work with this board.
Contact Brad for a custom Arcade Cabinet for your Man Cave, Bar, Restaurant, Small to Medium Business or High-Stakes Hospitality: 714-883-3016